Added Kaoko Cruise Control

Mileage: 9,811

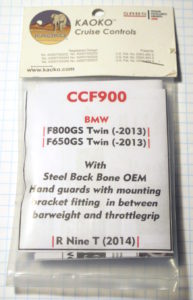
When buying a throttle lock, or cruise control, I found I had limited choices in terms of what would work with the BMW hand guards.  Fortunately I could still find the Kaoko CCF900 available from a few vendors.

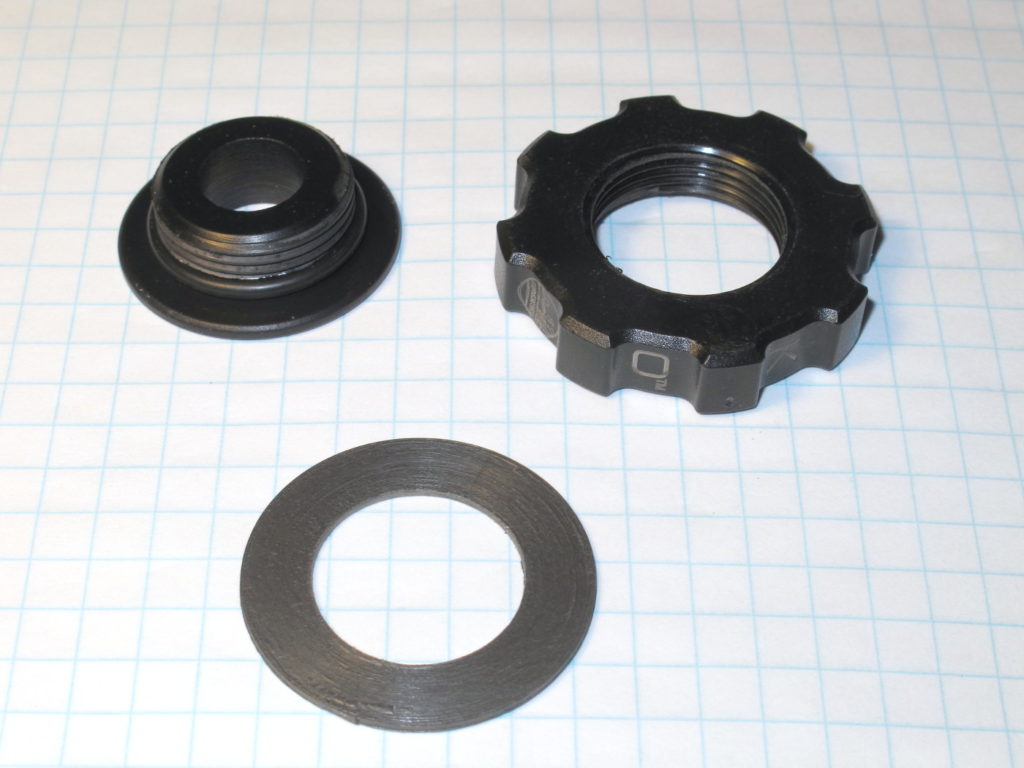
What I couldn’t find were pictures of this specific model, the CCF900,  so I’m making those available here.  As you can see, there are only three parts:  the reverse-threaded center hub with rubber o-ring, the outer nut, and the thrust washer.  It looks well made.

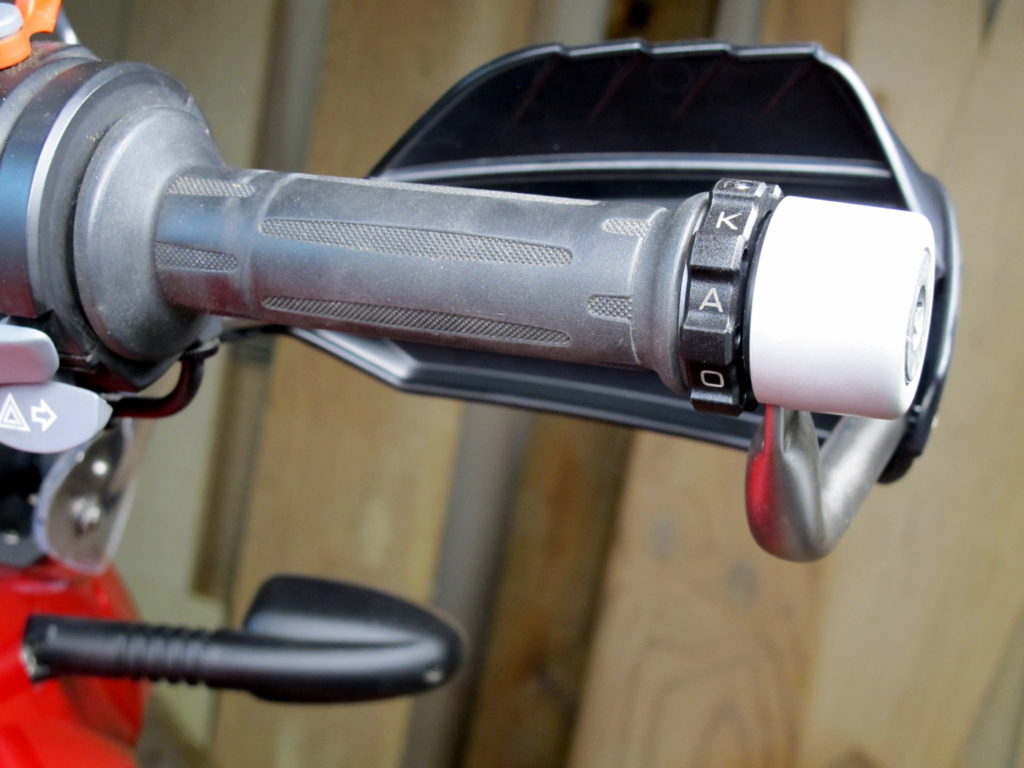
As for the installation, it took more time to take the pictures and edit this blog than it did to install the product.   I did have to pull out a bit on the guard in order to get the steel tubing over the end of the cruise control even though the grip was properly aligned on the bar.  The product seems to work well in the garage, so I expect it will work well on the road as well.

Kaoko CCF900 with BMW hand guard and heated grip

Installed OEM Hand Guards and SAE Accessory Plug

Mileage: 9,811

Today I installed BMW Hand guards.  Why BMW and not Barkbuster or some other after-market brand?   Well, in this case I think the BMW design is the best.  Most of the hand guards are aluminum, which is fine for knocking the brush out of the way.  However, I suspect the aluminum is more likely to bend if the bike goes over.

The BMW hand guards use steel tubes.  They’re strong!  I suspect it would be hard to break a clutch or break lever with the BMW solution.

A second reason I went with the BMW solution is that there’s no advertising on the plastic guards.  Frankly, I don’t want to be a rolling advert for Barkbusters.

The BMW guards come with aluminum bar ends to replace the heavier steel ends that came with the bike.  Given the weight of the steel tubing used in the guards I don’t expect that the handlebars will feel any different.

I fitted the large plastic guards with the optional spoilers to the steel bars.  Mostly I’m seeking a little more wind and rain protection.   The plastic guards need to have two holes drilled in them before the spoilers can be attached.  I don’t know why, but BMW chose to provide shiny bolts to attach the spoiler to the guard.  I think black bolts would look much better.  I may replace those bolts at some point in time.

One problem with the factory guards comes with the availabilities of  throttle locks.  Fortunately I was able to purchase a compatible Kaoko, but it appears that that particular model may have been discontinued, so there’s not a lot of stock available.

The bike was lacking an SAE plug for attaching accessories, or a battery tender.  I installed a fused connector directly onto the batter with the plug end tucked in below the handlebars on the left side.  It has a cover and tucks away out of sight when not in use.

Installed AltRider Crash Bars

Mileage: 9,811

Today I added AltRider Crash Bars.  I purchased them directly from AltRider.

Why AltRider?   Three reasons:

  1. Best mechanical design in terms of crash protection
  2. Best materials (stainless steel — no rusty scratches)
  3. Cleanest design (no visible nuts and bolts)

Most of the other crash bars that are available, including the factory bars, tie into mounting bosses on the front of the engine.  I don’t think this is a good idea.  It might help a little in terms of forces pushing the bars towards the rear of the bike, but a lot of the force in a crash will be from the side.  These front mounted solutions are likely to be much stiffer, which means  a lot of shock force will be transmitted to the front engine bolts as a shearing force.

The Altriders top mount fits into the frame providing a strong anchor against forces which push the bars rearward.  There will be some shearing forces on the bottom engine case bosses, but that’s true for all designs as they all attach at those locations.  Without being rigidly mounted to the front engine bosses, it looks to me like the AltRider bars are better able to transfer stresses to the other side of the bike and are more likely to flex, which if true would absorb some of the shock stresses and reduce the potential for cracked engine cases.  That said, I don’t know how much the bars will flex, they’re pretty stout.

The AltRider bars don’t look bad, but I think some of the other solutions look a bit more integrated with the bike’s styling.  However, for me, it’s function over form when it comes to crash protection.

I chose not to install the upper crash bars at this time.  I don’t know that they’ll add that much more protection. I do know that they’ll add weight higher up on the bike.

Pictures to follow.

New Front Tire, Oil Change, and Chain Maintenance

Mileage: 9,811

Summary:

  • Installed new Michelin Anakee III front tire
  • Changed Oil and Filter (BMW filter, 3 quarts Mobil 1 Racing 4T 10W-40)
  • Cleaned and lubricated chain
  • Checked chain tension:  30mm — no adjustment required

The front tire was well into the wear bars when I bought the bike.  When I went out for my first ride on that tire I discovered that the bike would tend to dive into corners — a problem that went away with the new tire.

The PO had already replaced the rear tire with a Michelin Anakee III.  I don’t know how many miles are on that tire, but it looks new.

There seems to be a lot of conflicting information about these tires.  Some swear by them, others refer to them as Panikee 3’s.  Many say they are loud at freeways speeds, not surprising given that the tread pattern crosses the middle of the tire, while others don’t notice them.   Some call them a 90/10 tire while others refer to them as 70/30.

Having recently changed four tires on two bikes, a job I detest, I got lazy and had the local BMW dealer mount and balance this one.

I took the bike for a short ride to top off the fuel tank, warm the bike up for an oil change, and check the new tire.  The bike handles much better.  I didn’t get above 60 MPH, but at that speed and below I couldn’t say that the tires were noisy.

While the engine was still warm  I changed the oil and installed a new filter.

The chain needed a good cleaning.  Using a toothbrush and kerosene I spent quite a bit of time getting all of the dirt and built-up wax off of the chain.   The chain now looks brand new and doesn’t look to be worn except for two outer and adjacent links that have a bit of corrosion on the outer plates.  I also checked the chain tension, with 30mm of play it was at the tight end of the 30-40mm spec, so no adjustment was necessary.