The Big Agnes Air Core Ultra insulated sleeping pad that I bought for motorcycle camping is great. However, as it’s 3″ thick when inflated, and it’s not self inflating, it takes a lot of air to fill. Not wanting to waste space on a battery powered pump I decided to build a bag pump. The first incarnation was made from a bit of PVC plumbing and a kitchen garbage bag. That worked, sort of, but the PVC tubing kept popping out of the inlet valve, and it was hard to keep a clear air path. After the last 10-day camping trip, I decided I needed something better. This second attempt works great.
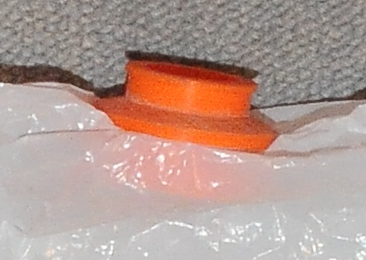
The bag pump consists of three parts: a Costco plastic kitchen garbage bag, and two 3D printed parts — a nozzle and a nut. Here’s what it looks like. Unlike the Big Agnes Pumphouse Ultra, which is a dry sack, this bag pump is compact enough to be easily stowed in the bottom of the bag that comes with the sleeping pad. I carry extra garbage bags, so I’m not concerned if this one rips, though it hasn’t yet.

To operate the pump:
-
-
-
- Insert the nozzle into the pad’s inlet
- Capture air in the garbage bag by blowing lightly into it, or holding it open to the wind
- Quickly close the open end (i.e. wad it up in your fist)
- Gently squeeze the trapped air into the sleeping pad.
- Repeat until the mattress is full (about 5 times)
-
-
To see a similar DIY pump in action watch this video. The action starts a little after the 2 minute mark.
Here’s a picture of the 3D printed nozzle and nut. This is my first time printing threaded parts. The fit and finish came out nearly perfect and certainly exceeded my expectations. I admit to guessing at the clearance needed for the threads. I got lucky, they work perfectly.
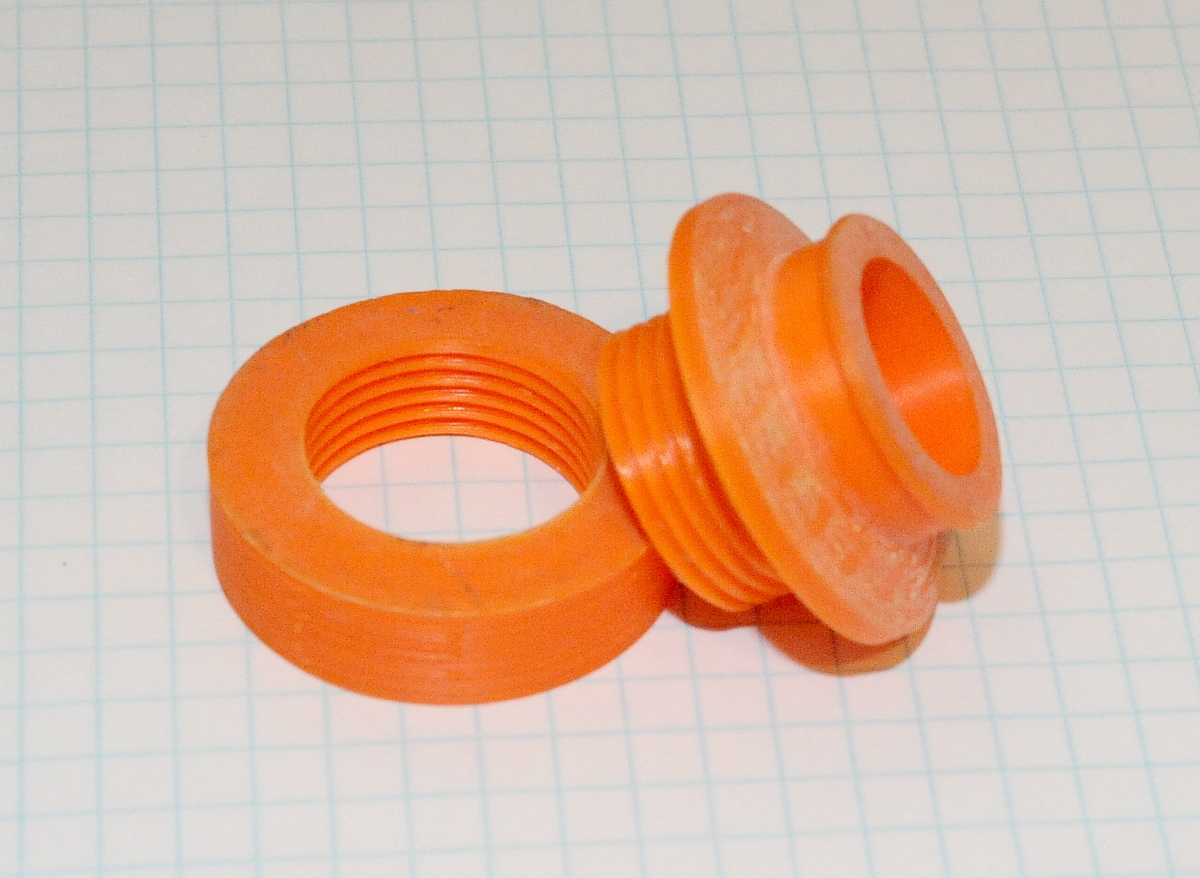
Obviously the nozzle passes through a hole cut in the bottom of the garbage bag. To cut the hole I started by turning the bag inside out and then pressed the nozzle tightly against the location I wanted to cut — stretching the plastic bag. I then cut the hole by running a razor blade around the inner circumference of the nozzle. This leaves the hole slightly undersized, which is what I wanted. After pushing the threaded end through the hole I secured everything with the nut before turning the bag right-side out.
I printed these parts on my Monoprice Mini 3D Printer using Hatchbox ABS @ 230 degrees (70deg bed) with a layer height of 0.175. The nozzle is printed oriented with the threads up. It was printed with supports for the flange. The 60 degree threads are printed without supports by limiting the supports in my slicer (Cura) to overhangs greater than 61 degrees.
While it hasn’t been a problem, the sharp edge around the nut does put a lot of stress on the plastic bag. If I ever decide to print another one of these, I think I’ll round off the sharp corners on the nut.
STL files:NozzleAndNut