I recently had to install a new garage door opener in a tightly constrained place. As I couldn’t find a lot of helpful info on the web regarding tight installs, especially for belt-drive units, I decided to document and share my install with you here. Obviously you should follow the installation instructions that come with your garage door opener.
The problem: Because of enclosed furnace ducting, the garage door opener needed to be less than 116″ in overall length. Most 7′ garage door openers are 124″ in length, or longer. Also, it’s not easy to discover from web searches just how much clearance you’ll need on the back of the unit for wiring, access to adjustments, light covers, etc.
The Chamberlain® B970 opener I installed works well in tight spaces. Other similar models from Chamberlain and LiftMaster® may work as well. Here’s why:
- While not super-simple to accomplish, the unit can be shortened by cutting the rail and belt.
- I didn’t need to buy anything extra to make the modifications.
- Very little clearance is required on the back of the motor. There’s nothing that needs to be adjusted or otherwise accessed on the rear of the unit. That includes opening and closing the light covers. This allows the available space to be fully used to maximize the lift distance.
The first problem to solve is determining how much of the rail needs to be removed. The challenge here is that the rail sections, once assembled, are hard to take apart so I attempted to estimate of the total length from partially assembled components, including the front bracket, and came up with an estimated overall length of 123″, which reassuringly matched the info on Chamberlain’s website. From that number I calculated that I needed to cut off 7.5″ from the open end of the center section of rail. to achieve an overall length of 115.5″ .
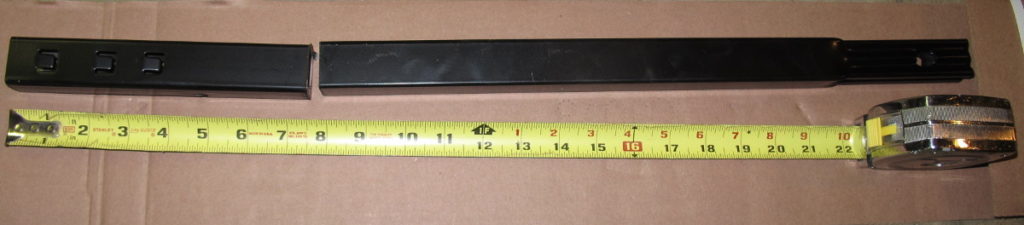
Best laid plans…. After cutting, I assembled everything and found that I still was an inch too long. I think the error came from the sections of rail not fitting as tightly together as I thought they would, so the stock unit is probably 124″ long, in spite of published info.
To make a second cut I needed to disassemble the rail. Since the shortened section no longer has locking tabs, removing that end from the motor end of the assembled rail was easy, but with six locking tabs, it looked too hard to separate the front two sections from the center section, so I made the second 1″ cut with the front sections still attached. Note: I think it would be easy to bend the locking tabs up before assembling to make disassembly easier.
The stock length may vary from unit to unit depending on how well the rail pieces fit together, so don’t rely on my measurements. While it was a pain to make two cuts, I prefer that to cutting too much on the first try.
Now to the belt. I needed to remove twice as much belt as rail. As I removed 8.5 inches of rail, I cut off approximately 17″ of belt. I say approximately because I cut in the closest notch between teeth. A tooth one way or the other wasn’t going to matter as there’s plenty of adjustment travel in the spring load.
Chamberlain has an article on how to shorten the belt, but it’s a bit confusing. The article is titled How to install the belt splice kit 41B5669, 29B129 and 29B130 Shortening belt kits. Now I couldn’t figure out which part numbers applied because it depends on the number of teeth in 6″ of the belt, and that number appears to be secret. For the B970, the secret answer is 20 teeth in 6″ (don’t tell anyone!), so the correct part is “belt splice kit 41B5669″. The part description is misleading as the belt is not spliced. This part is actually a new end to replace the one that gets cut off — the end that attaches to a chain link, not the other end with the hook.
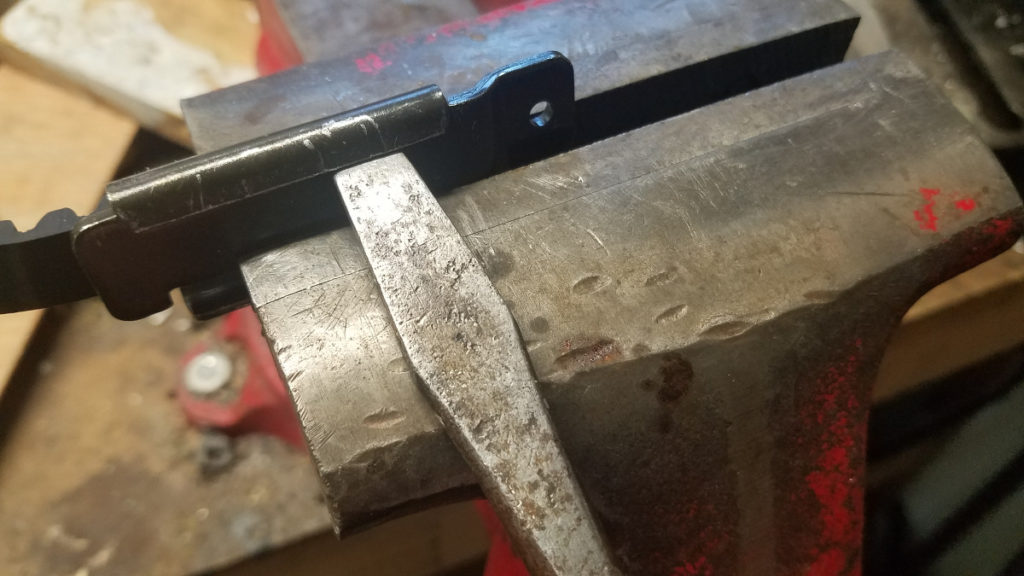
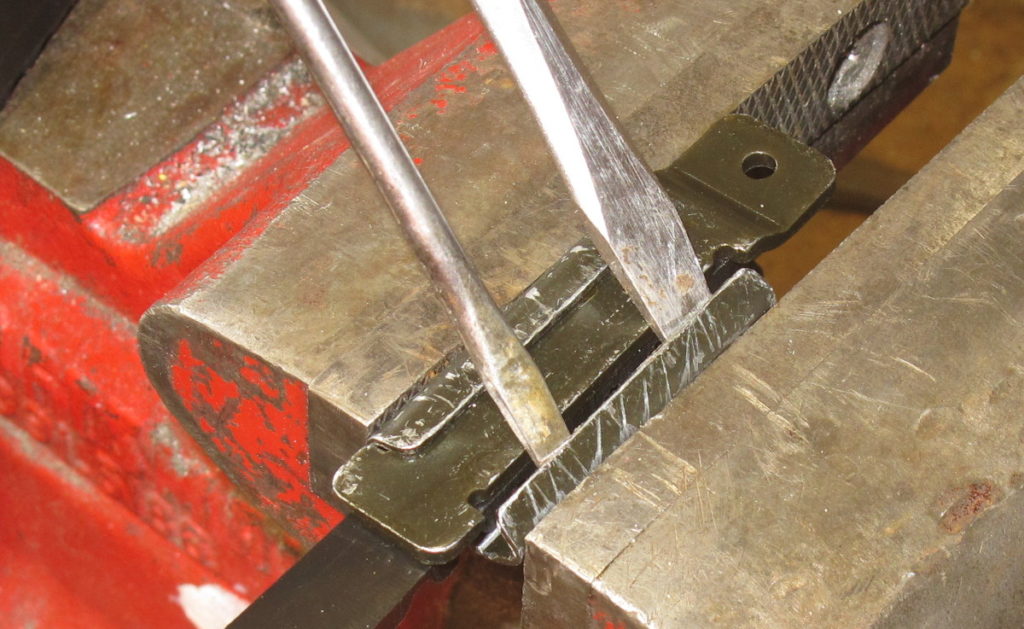
I didn’t order the shortening kit, though I probably would have if I could have figured out what part to order ahead of time. After opening the box and pulling out the belt to count teeth, I looked at the existing clip and decided to attempt to re-use it instead of replacing it. So, using a vice and large screwdriver, I pried the clip apart before cutting the cable. Fortunately the metal is quite malleable, and showed no signs of splitting, or cracking after I put everything back together.
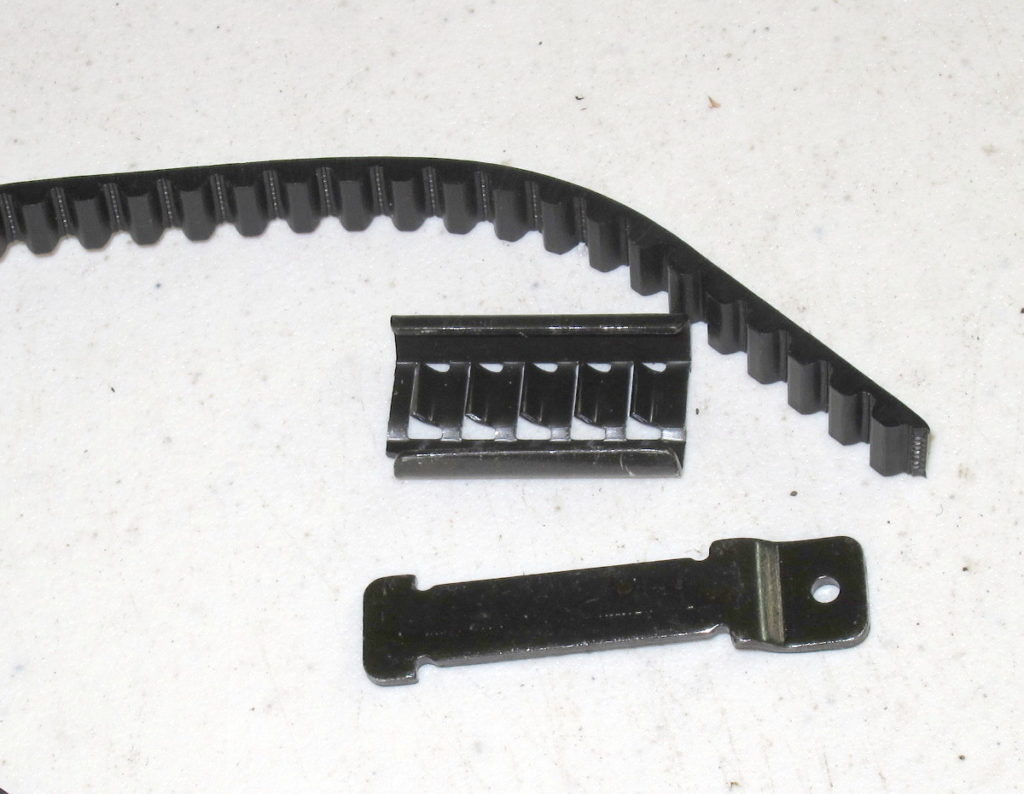
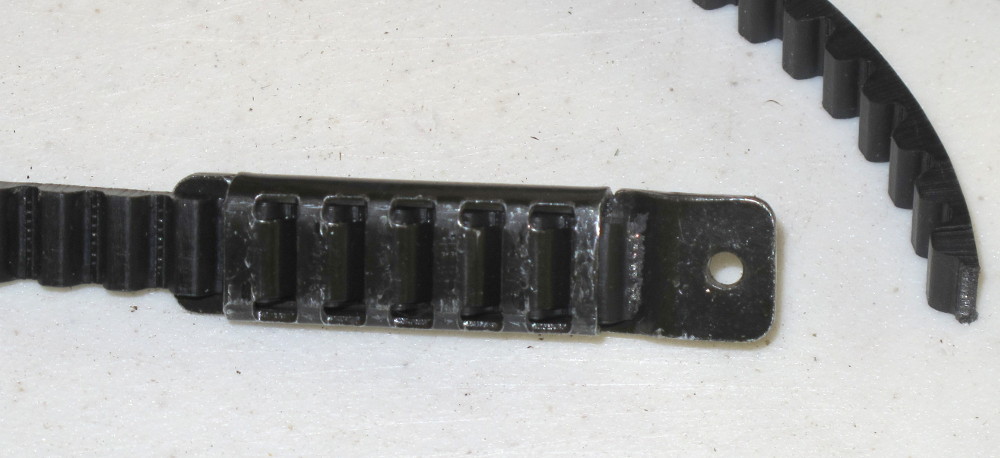
Note: In the photo above there’s a notched corner in the tabbed piece and the asymmetric notches in the flat piece. This is was my clue on how to reassemble the parts.
The belt has steel wires inside, so I used a hacksaw to cut it. To put the end back on I slid the belt and flat piece under the lip that was less bent out. I then used a vice to squeeze in the sides. For the first bit of squeezing I inserted two small screwdrivers between the flat piece and the lip on the side that was further bent out, using them like shoe horns to ensure that the lip went up and over the flat piece. Once the lip was partially over the flat piece I removed the screwdrivers and tightened the vice until the sides were back to their original shape. I then used the vice again to make sure that the lips were tight and compressing the belt.
As I mentioned earlier, this opener doesn’t require access on the back side, so it can be mounted very close to a beam, or other obstruction, In my install I intentionally left about 1/2″ of space between the back of the unit and the sheet rock to clear some wires and to allow room for the unit to swing into place.
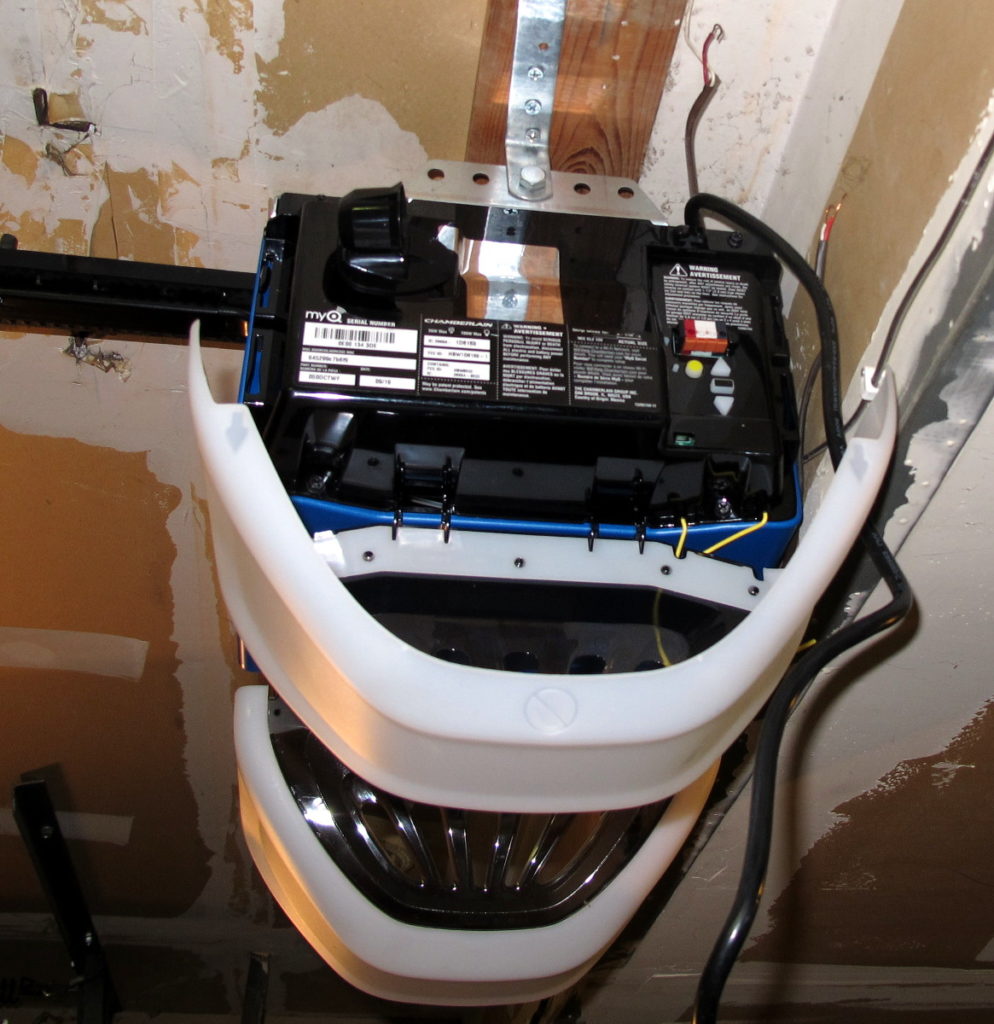
My install is also vertically challenged. The tallest point on the motor unit is the cover over the belt-drive pulley. That’s what limited me from getting any closer to the ceiling at the back. The top of the rail ended up about 1-1/4″ from the ceiling at the motor. At the door, the top of the bracket is level with the ceiling and the rail is about 3/4″ from the ceiling. As mounted, I have about 1/4″ clearance between the rail and the door at its closest approach when opening. It doesn’t hit, that’s what counts.
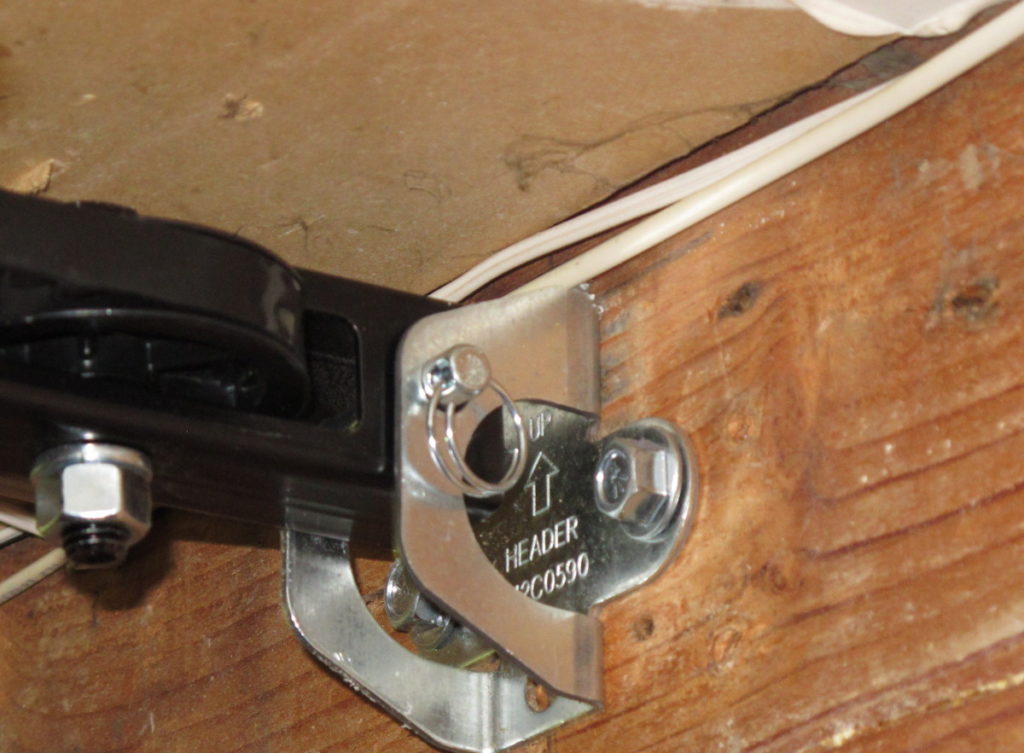
The wires running across the top of the header bracket are for the sensors. I had planned on running them together down one side of the garage, but the wires aren’t long enough. I ended up bringing them together near this mount at the center of the door, and running them back along the ceiling next the the rail.
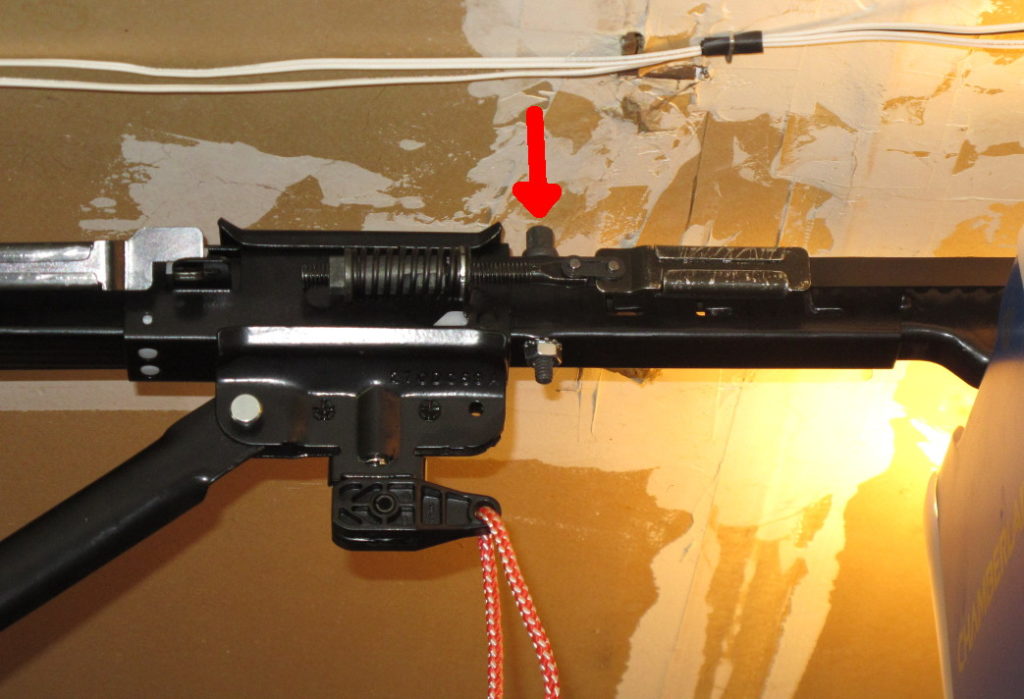
The reduction in overall length of the opener also reduces the amount of the garage door lift. I don’t have a problem as my vehicle is small, but the door isn’t quite fully open. One of the limiting factors is the “Cover protection bolt” shown in the picture above. As you can see it may be a bit overprotective. I think it’s where it is to avoid the overlapping sections of rail. Had I been desperate for more lift, I would have relocated that bolt closer to the motor to pick up a few more inches. In this picture the trolley is stopped at the programmed up position.
It took me over 5 hours for this custom install (including removal of the old unit), If I had to do it again, I think I could probably shave 1-2 hours off that time.
This garage door opener is very quiet. I hope it’s as reliable as the one it replaced. That unit is probably about 30 years old.
Other than perhaps a minor grip about sensor wires being a bit short, the only negative thing I have to say about the unit at this time is that the timer-to-close (TTC) feature won’t do what I want. The minimum delay time is 1 minute. On the opener I replaced, when I pressed the wall switch the lights would flash for a few seconds and I could get out of the garage before the door started closing. As I don’t want to have to hang around for more than a minute waiting for the garage to close, I guess I’ll do the run-and-leap-over-the-invisible-beam-while-trying-to avoid-a-closing-garage-door dance. Or, if I don’t feel like dancing, use the supplied outdoor keypad to close the garage. It would have been nice to have 5 and 10 second options on the TTC feature. Chamberlain, if you’re reading this, I’d be more than happy to beta test that enhancement.